Install the SalesForce Screen Flow package from here.
After installation, first make sure that you have entered your credentials for the AFD API. You can do this by selecting ‘Setup’ from the top right-hand corner and then going to ‘Custom Code’ > ‘Custom Settings’.
Next to Address Config, click on ‘Manage’ then under ‘Default Organization Level Value’, click on ‘Create New View’.

Choose an appropriate name, maximum response is how many results you want to appear when searching for an address. Enter your serial number and password, and in the “Serial Endpoint” field enter https://api.afd.co.uk/
If you want to use ID and Token, contact support at support@afd.co.uk and provide the domains for your organisation. They can be found in Setup > User Interface > Sites and Domains > Domains

If you have been supplied with ID and Token, enter them instead of serial and password. In the “Token Endpoint” field, enter https://apps.afd.co.uk/json, and ensure “Use Token” is ticked.


It should appear as follows once set:

After you have setup your credentials, you need to ensure that you have updated/imported the country list into the AFD Countries Object.
To do this, go via the App Launcher and select ‘View All’ – scroll to ‘All Items’ and choose ‘AFD Countries’. Select the import option. An example CSV file can be downloaded here.


Continue to the next page to import. Once imported, go back to the Countries page, and select the setup option – ‘Select Fields to display’ to display the imported country fields.

Within the flow build, when editing your screen, add the Address Finder (AFD Validation) component from the components list from within the custom section.
The address Finder component should appear as follows:

Set the properties of the component to define the address fields to be displayed. The address component properties will generate the address fields. If you have existing address fields within your screen, you will need to replace them with the component field settings for interaction with the lookup.
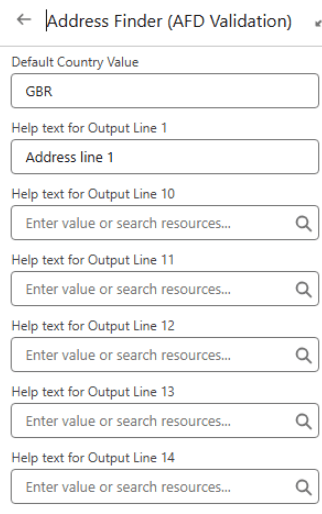
Set the Default Country to the 3-character ISO code (e.g., GBR). This will default the country component to UK addresses.
The list data returned by the initial lookup makes use of the list value from the field presets e.g. Standard. The AFD Field Type should be set to one of these. Should your required output fields be available in the same preset (e.g. Standard fields), the AFD Field Type setting will determine the fields returned.
Note. For nested fields, each layer must be split by a full stop. For example:

Additionally, there is a ‘custom fields’ option. This allows you to specify the individual fields you want to be mapped into your output fields, should your required fields span multiple field presets (e.g. fields from the standard and raw presets). The example below shows how to combine fields from the raw and standard data presets.
Note. You will need to enter the fieldnames separated by the @ symbol as shown and make sure they are correctly mapped in the “AFD Field to map for Output” fields too (further details below). Please note that full stops are not required in this section.

In addition, set the AFD Password and AFD Serial field setting.
There are 3 sets of field properties. The AFD Field to map, The Label for the Output, and the Output Value.
AFD Field to Map – set this to the field value returned from the lookup. For example, setting to Address1:

Set the label that will be displayed for this field at the corresponding ‘Label for Output’ . For example, ‘Address Line 1’:

The Output value fields are what you will use when assigning the field values to your object via the create records element.
When viewing your screen flow page, it should appear as follows, when set with the examples above:

You can specify the Helptext for a field which will be displayed as a tooltip.
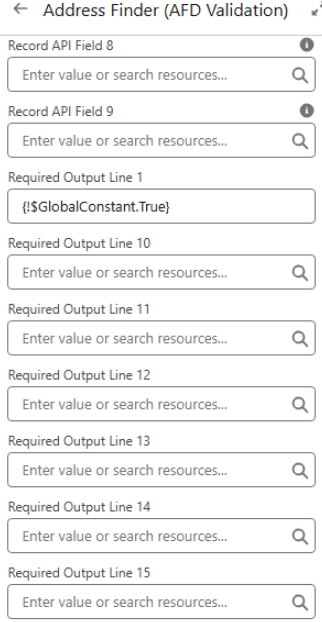
To mark fields as Mandatory add {!$GlobalConstant.True} to the chosen “Required Output line” field.
For use in the Record Details page or the Dynamic Record Details page, please use the component Address Finder for Record Page (AFD Validation). Drag and drop the component into the section of Record details.

To ensure this works correctly, it is required that you have already updated/imported the country list into the AFD Countries Object. Within the flow build, the properties of the component to define the phone fields will be displayed like the below:


To ensure this works correctly, it is required that you have already updated/imported the country list into the AFD Countries Object. Within the flow build, the properties of the component to define the phone fields will be displayed like the below:


All API Calls will be stored in an object called AFD API Logs:


Once inside the AFD Bulk Address Validation app, you will have access to three key sections:

Click create New Template button from screen and it will open up new popup to setup template.


As Refiner is a UK product, we suggest adding a rule to only run against your UK records – here is an example using Billing Country:


This page will display any error encountered during the data cleaning process so that a user may establish the issue and resolve it. If the user is unable to resolve the issue themselves, please quote this error when contacting our Support team.

cs_update_batch_job

We serve thousands of organisations and a network of hundreds of partners across multiple industry sectors, enabling them to have full confidence in their contact data.
We use cookies to enhance your browsing experience, and analyse our traffic. By clicking "Accept", you consent to our use of cookies.
